Documentation / Projects
Projects & Tasks
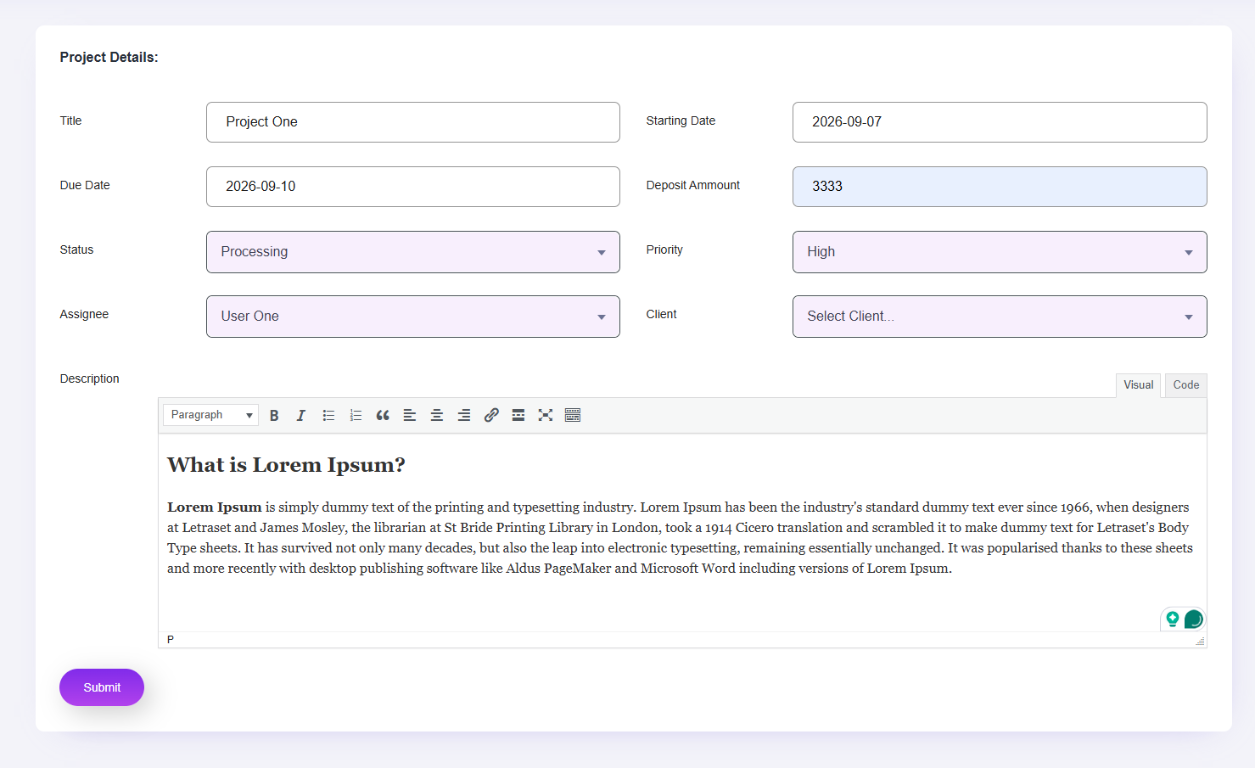
What this screenshot shows
Use the Project form to create or edit a project. The form brings together project identity, dates, client/employee relationships, status, and descriptive information shown in the interface. Complete the required project information before saving.
- The project form combines project identity, dates, status, client/employee relationships and description.
- Dropdowns help associate the project with existing records.
- Complete the project information and save before managing the project from the list/dashboard.
- Customer tip: Use the screenshot as a visual guide, but follow the field-by-field instructions on this page for the exact configuration.

What this screenshot shows
After projects are created, this screen provides the overview of project records and summary information. Use the filters and available actions to locate projects and manage their current state.
- The upper cards summarize project information.
- Filtering controls help narrow the project list.
- The project table provides row-level actions for managing individual projects.
- Customer tip: Use the screenshot as a visual guide, but follow the field-by-field instructions on this page for the exact configuration.
Clockinator Pro includes Projects and task-hour functionality. Client records can be used alongside project records.
Recommended setup
- Create a Client if your project requires one.
- Open Clockinator Pro → Projects.
- Create the project.
- Assign the relevant employees using the available controls.
- Use task/project hour tracking where enabled.
- Review project-related reporting.
Relationship: Project/time information can feed into reporting workflows; exact fields and calculations depend on the installed project/task screens.