Documentation / License
License
Clockinator Pro includes a dedicated License admin panel. The supplied source also contains a license guard used by the plugin.
Recommended workflow
- Open Clockinator Pro → License.
- Enter the license information supplied with your purchase.
- Save/activate using the controls shown by your installed version.
- If an addon requires a separate activation, complete that activation before expecting its conditional menu to appear.
Security: Never publish your license key, API keys, kiosk keys or other credentials in screenshots, support posts or public documentation.
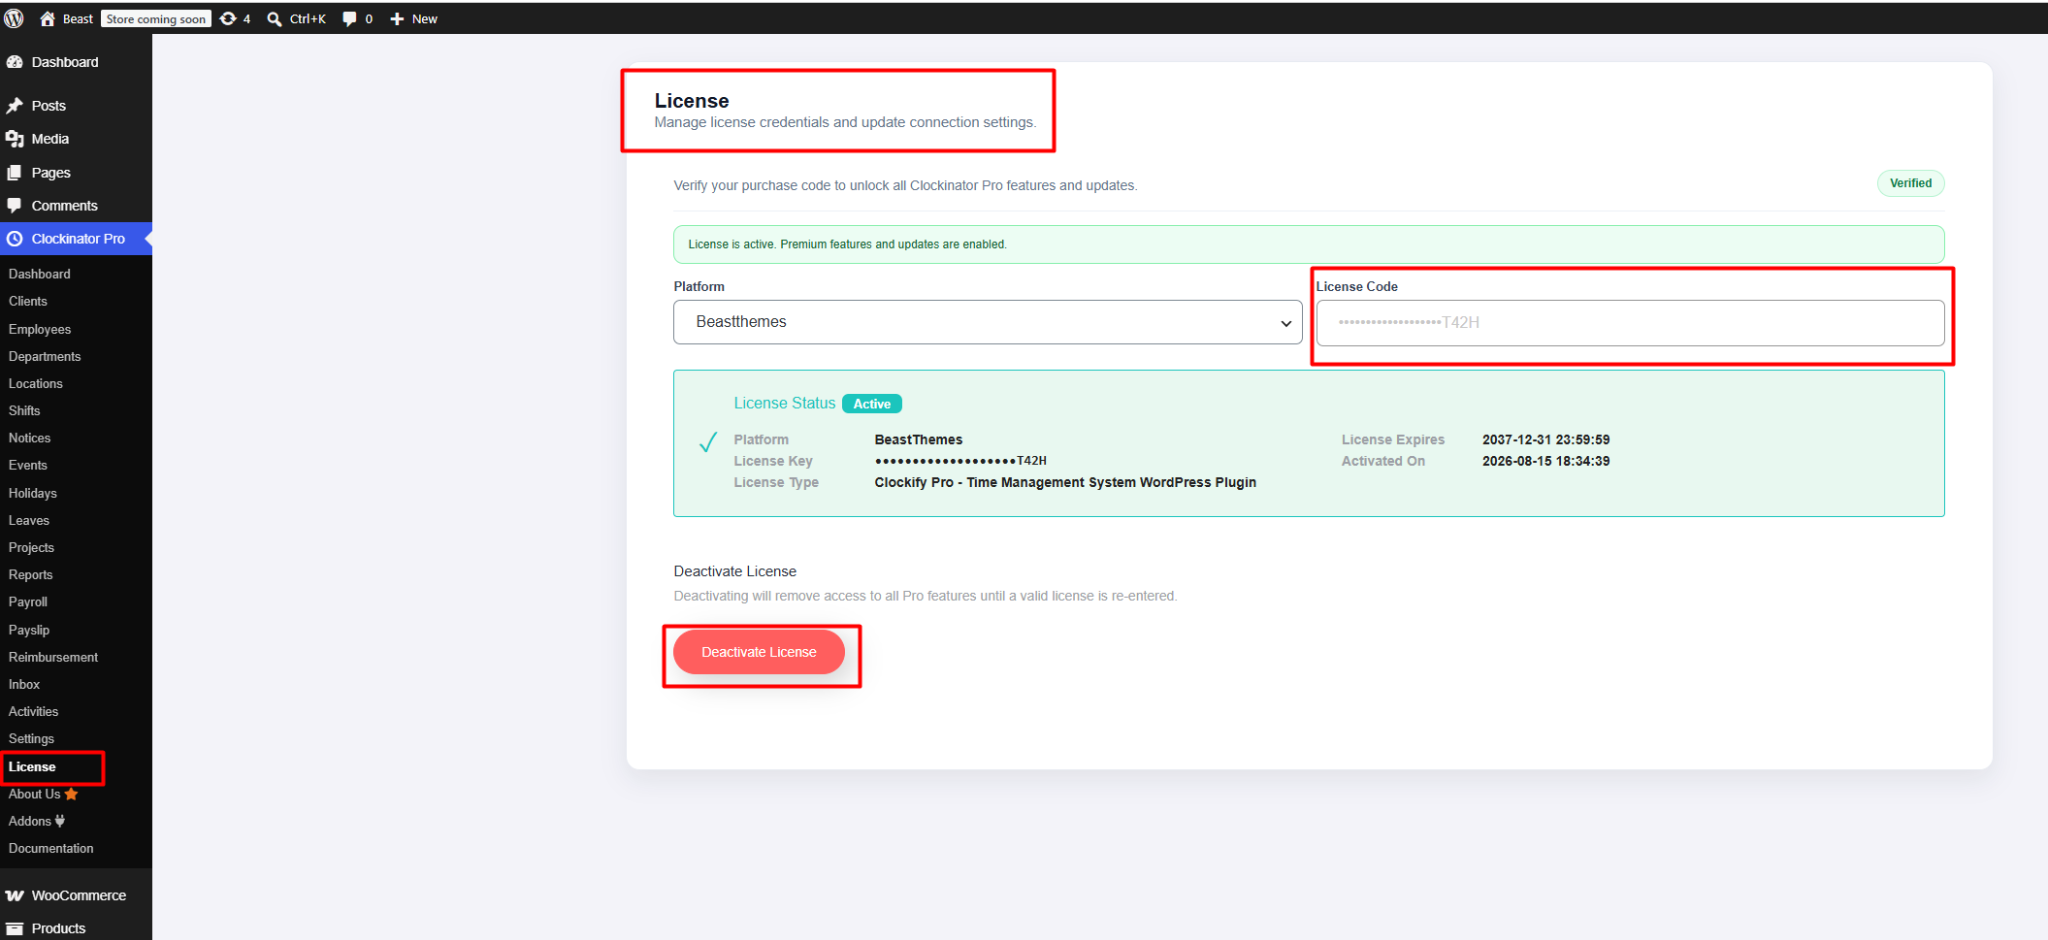
Understanding the License screen
- License page: The page heading identifies this area as the place to manage license credentials and connection settings.
- Platform: The screenshot shows BeastThemes selected as the platform.
- License Code: Enter the purchase/license code supplied with your Clockinator Pro purchase. The screenshot intentionally shows the code masked.
- Verification status: The green Verified indicator and License Status: Active message show a successfully activated license in this example.
- License information: The panel can display the platform, masked license key, license type, activation date, and expiry information.
- Deactivate License: Use this control when you intentionally need to deactivate the current license. Deactivation can remove access to Pro features until a valid license is entered again.
Security: Never publish your full license code. When creating documentation, support tickets, tutorials, or screenshots, keep license credentials masked as shown in the supplied example.