Documentation / Notifications
Notifications
Clockinator Pro includes notification settings and email/SMS-related functionality.
Configuration areas
- Email notification settings
- SMS notification settings/templates
- Notification templates available in Settings
Configure the provider credentials and triggers exposed by your installation, then test one notification before enabling a large production workflow.
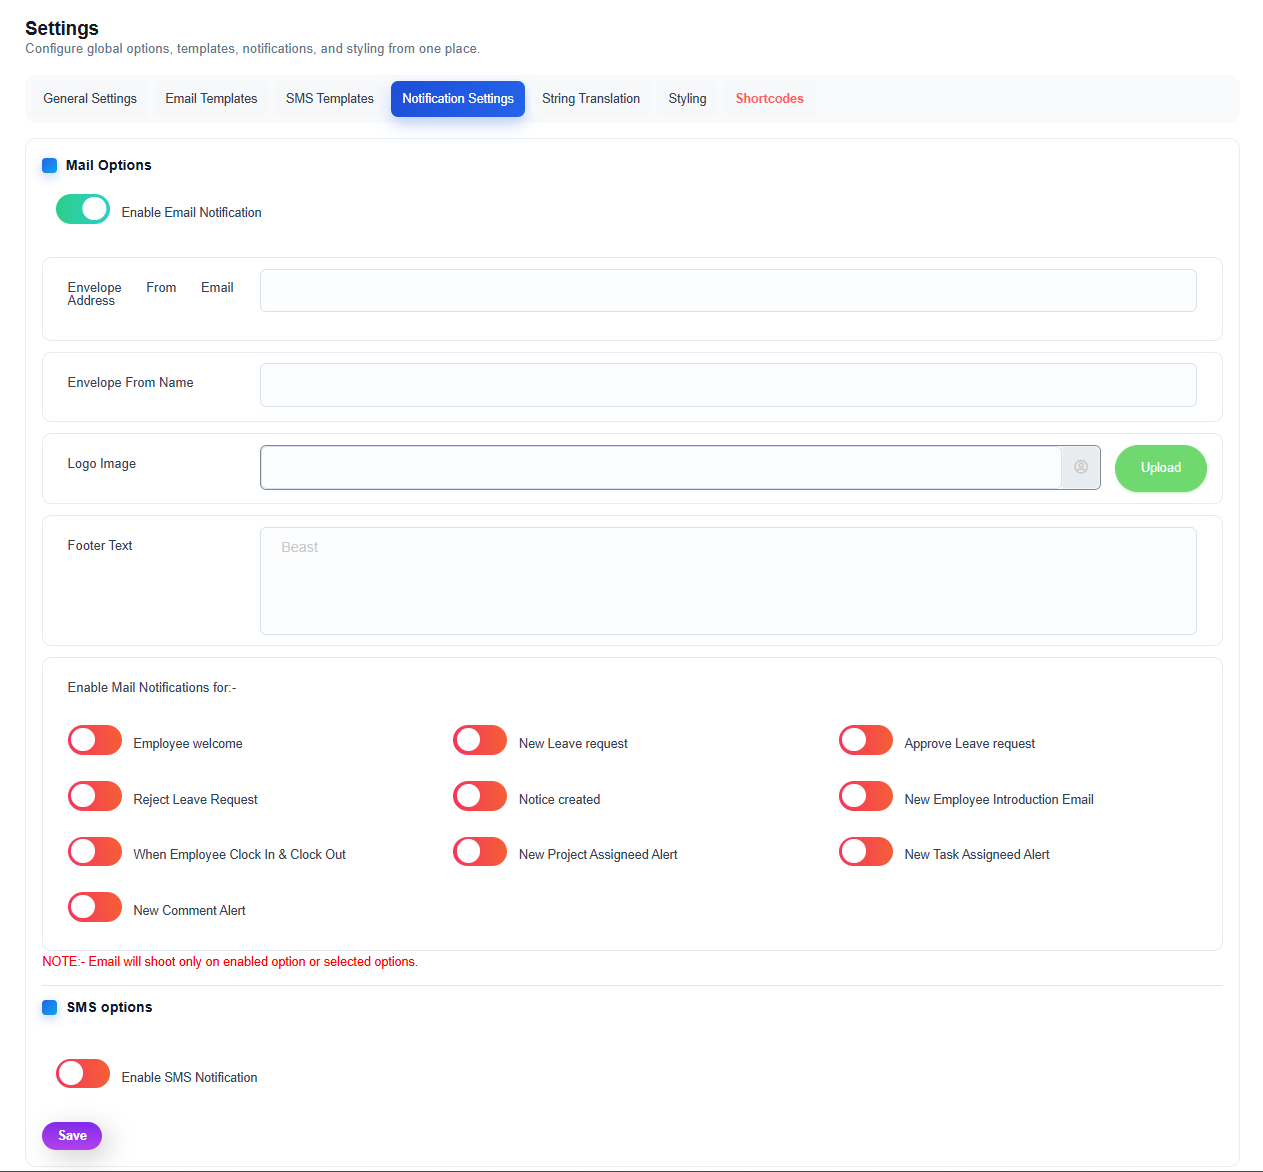
What this screen shows
- Notification Settings tab: The screenshot shows Notification Settings selected alongside General Settings, Email Templates, SMS Templates, String Translation, Styling, and Shortcodes.
- Enable Email Notification: This master control enables email notification functionality.
- Email sender configuration: The page provides fields for the envelope-from email address, envelope-from name, logo image, and footer text.
- Individual notification triggers: The screen provides separate controls for events including employee welcome, new leave requests, approved/rejected leave requests, notices, employee introduction emails, clock-in/clock-out, project assignment, task assignment, and new comment alerts.
- Important behavior: The red note on the live UI states that email is sent when the relevant option or options are enabled.
- SMS options: A separate SMS notification switch is available lower on the page. Configure SMS only after the required SMS functionality/provider settings are available in your installation.
- Save: Use the Save button after changing notification settings so the configuration is stored.
Recommended Notification Setup
- Enable the master email notification option.
- Enter the sender email and sender name you want recipients to see.
- Upload the appropriate logo if you want it used in notification emails.
- Review each individual notification trigger and enable only the events your organization needs.
- Save the settings.
- Perform a small test, such as a test employee welcome or leave workflow, before enabling every notification in production.