Installation
Install Clockinator Pro as a normal WordPress plugin using the supplied ZIP package.
Step 1 — Upload the plugin
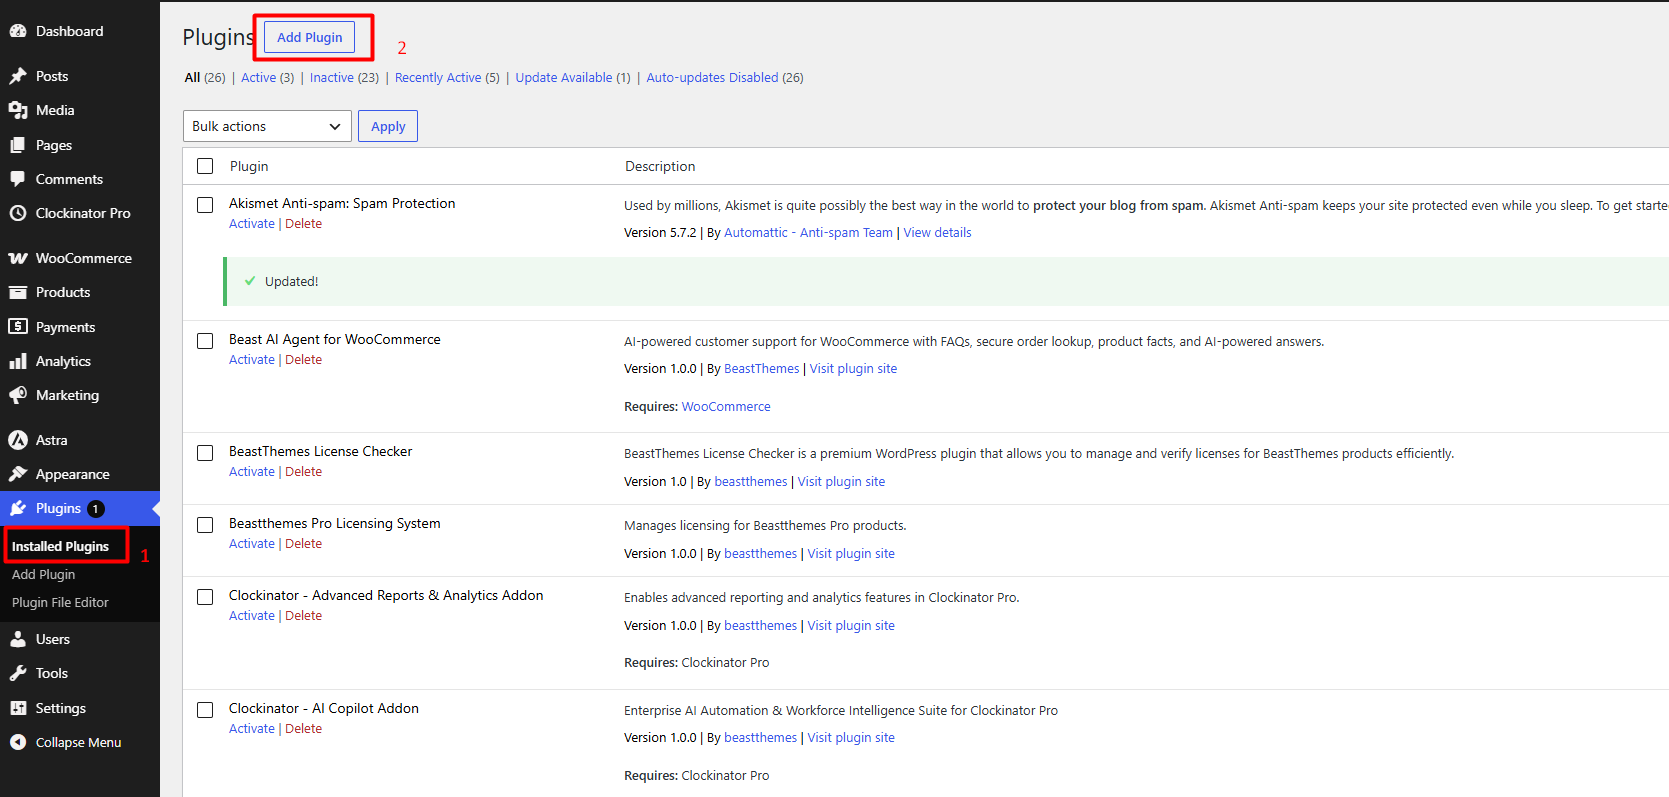
In WordPress, open Plugins → Add New → Upload Plugin. Select the Clockinator Pro ZIP, install it, and activate it.
Step 2 — Verify activation
After activation, the Clockinator Pro administration menu is registered. The supplied source defines the plugin version as 1.9.
manage_options capability. Employee-facing menus use the plugin's employee record/role
logic and the WordPress subscriber capability.
Step 3 — Check the menu
For administrators, the source registers Dashboard, Clients, Employees, Departments, Locations, Shifts, Notices, Events, Holidays, Leaves, Projects, Reports, Payroll, Payslip, Reimbursement, Inbox, Activities, Settings, License, About Us, Addons, Documentation and Help. API Panel and Biometric Devices are conditional.
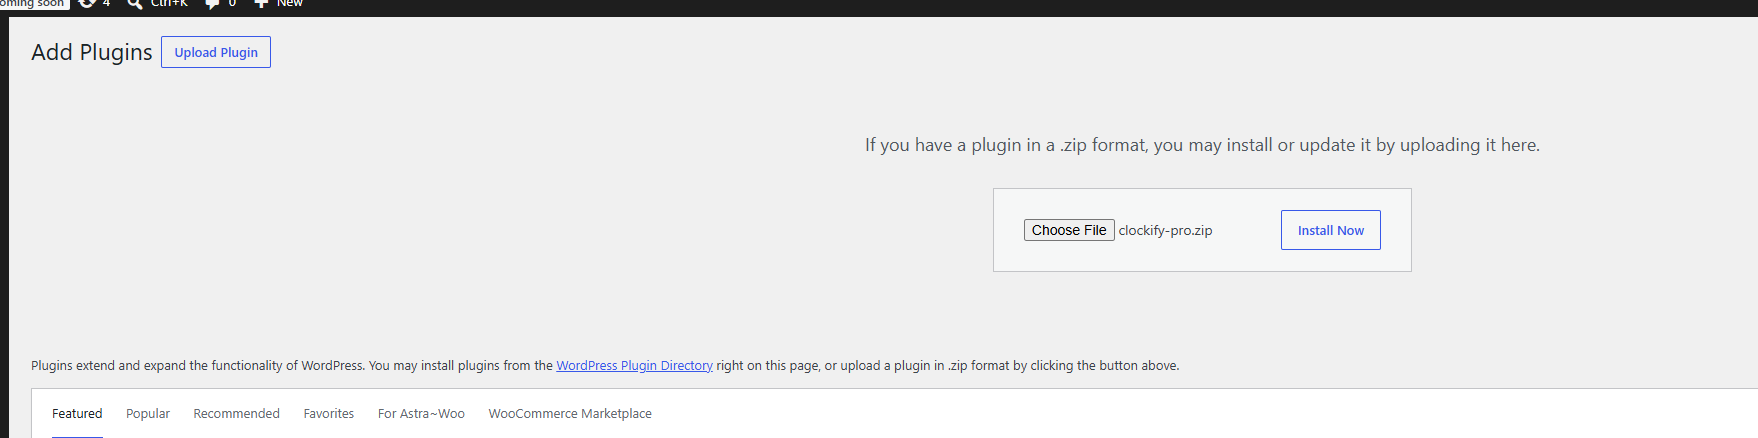
What this screen shows
- Add Plugins: This is the standard WordPress plugin installation screen.
- Upload Plugin: The button opens the ZIP-upload interface used when the plugin is supplied as a ZIP file.
- Choose File: The screenshot shows clockify-pro.zip selected. Select the ZIP supplied with your Clockinator Pro purchase.
- Install Now: Click this button after selecting the ZIP to start the WordPress installation process.
- Customer tip: Keep the original ZIP available in case you need to reinstall or update the plugin later.
Installation Result
After WordPress finishes installing the ZIP, activate Clockinator Pro from the Installed Plugins screen. The next screenshot shows the resulting plugin list and also demonstrates how Clockinator Pro relates to optional addons.
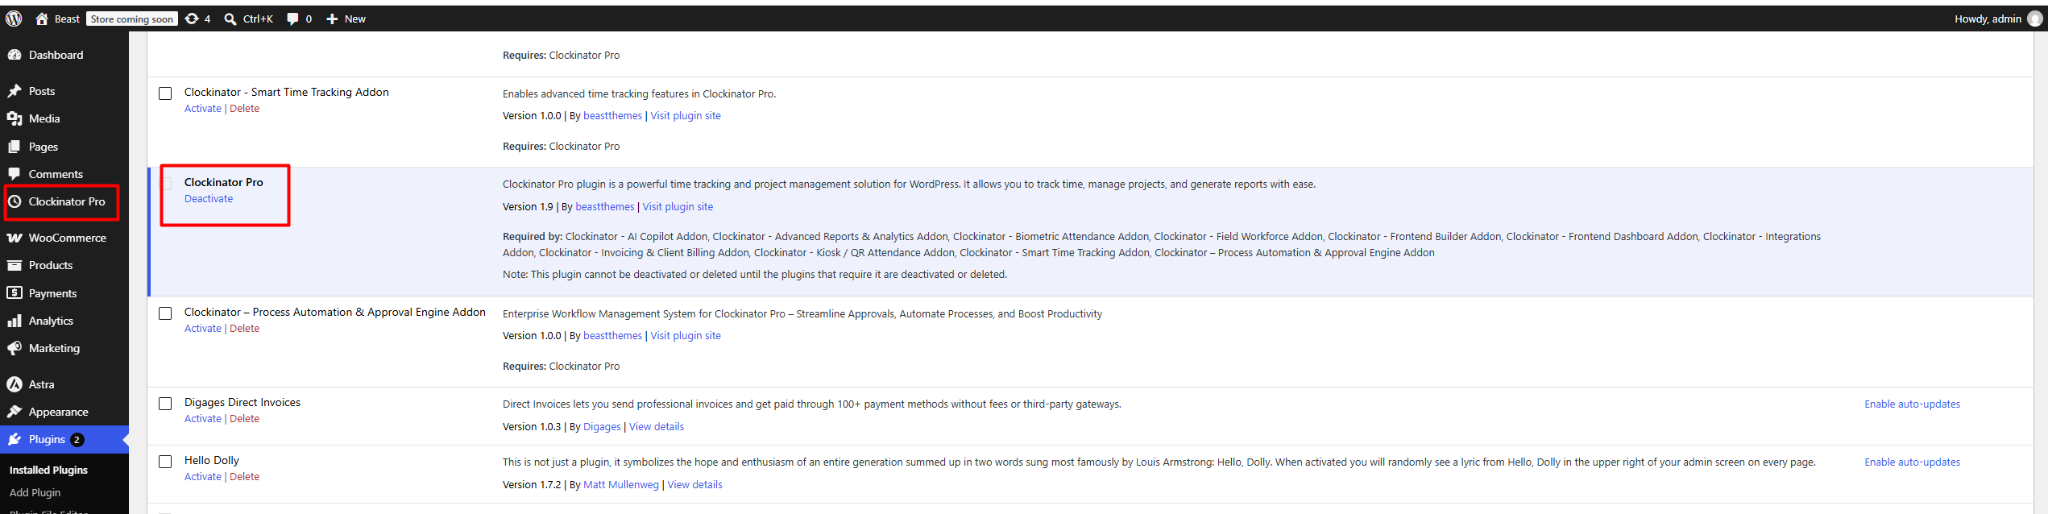
What this screen shows
- Clockinator Pro is active: The blue-highlighted Clockinator Pro row displays a Deactivate action, confirming that the core plugin is active.
- Clockinator Pro menu: The left WordPress admin menu contains the Clockinator Pro entry, which is the starting point for the plugin's admin panels.
- Addon dependency: The screen explicitly lists Clockinator addons as requiring Clockinator Pro. This means the core plugin should remain installed and active while dependent addons are being used.
- Addon activation: Installed addons show an Activate action until they are enabled. Installing an addon ZIP alone does not mean the addon is active.
- Version visibility: WordPress displays the installed version and plugin author information in the plugin list.
- Important: If an addon requires Clockinator Pro, WordPress will prevent deactivation/deletion of the core plugin while dependent addons remain active.