In this guide, we explore all the features of the “Projectify WordPress premium plugin” and how to use those features and options that this plugin provides.
Projectify WordPress premium plugin is the World’s most advanced project management system which helps you to run your business efficiently and effectively, providing all of the tools that you need to communicate with your clients and your team. Keep all your information in one place, easily accessible. This plugin provides you the features to create a project’s milestones, tasks, subtasks, and bugs. Your team members can access and track their assigned tasks & subtasks. Also, Administrator can send project related messages and alerts to their team member or your client which related to projects. Clients can also track their project updates and status. It also provides Task/Project user update notification ( it send project update notification alerts via email or SMS ). You can use the Nexmo SMS gateway to send SMS.
Activating the Projectify – Project management system WordPress Premium Plugin
After purchasing the plugin you will get a zip file of the plugin that you can directly upload to your WordPress site from “Plugins” > “Add New” > “Upload Plugin”. Then, you can activate the plugin from “Plugins” > “Installed Plugins”.
After activating the plugin, you will see a new menu “Projectify” on your WordPress admin menu tabs
Projectify WordPress Premium Plugin Features
- Admin Dashboard Panel
- Admin Team Panel
- Admin Members Panel
- Admin Clients Panel
- Admin Projects Panel
- Admin Tasks Panel
- Admin Announcement Panel
- Settings Panel
- Team Member Dashboard
- Client Dashboard
Admin Dashboard Panel
Step 1 – Login to your WordPress Dashboard.
Step 2 – Go to Projectify > Dashboard. its a centralized dashboard from where you can manage all your project and client status.

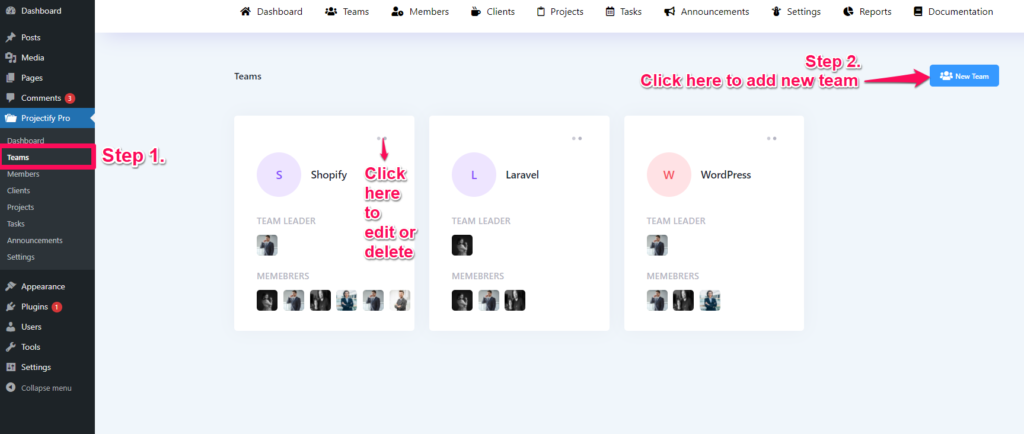
Admin Team Panel
Step 1 – Login to your WordPress Dashboard.
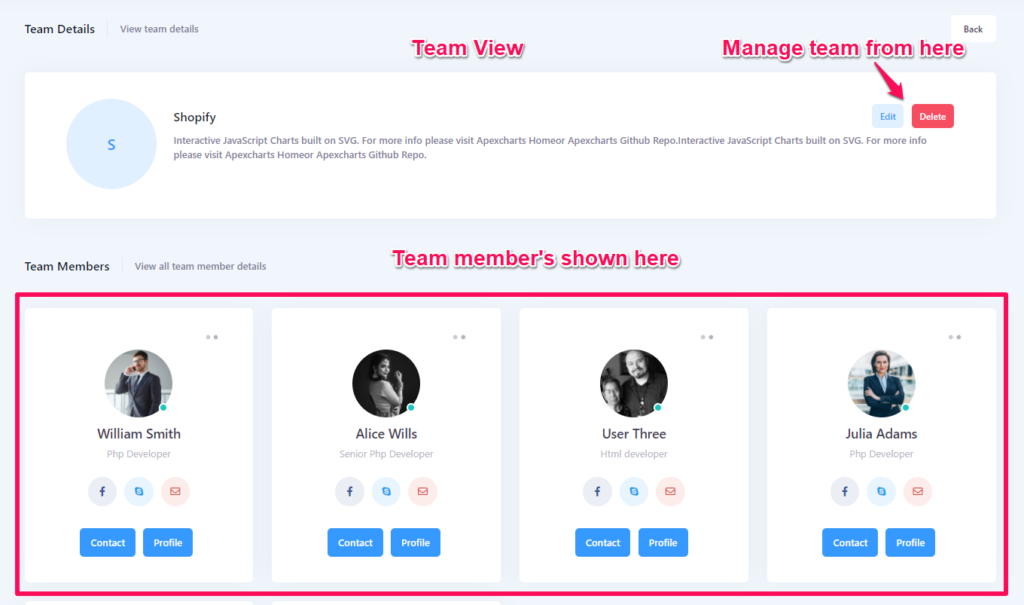
Step 2 – Go to Projectify > Teams. To add a new team, click on New team, then team form will open then you have to fill all the details and select teams members for that team and submit the form.
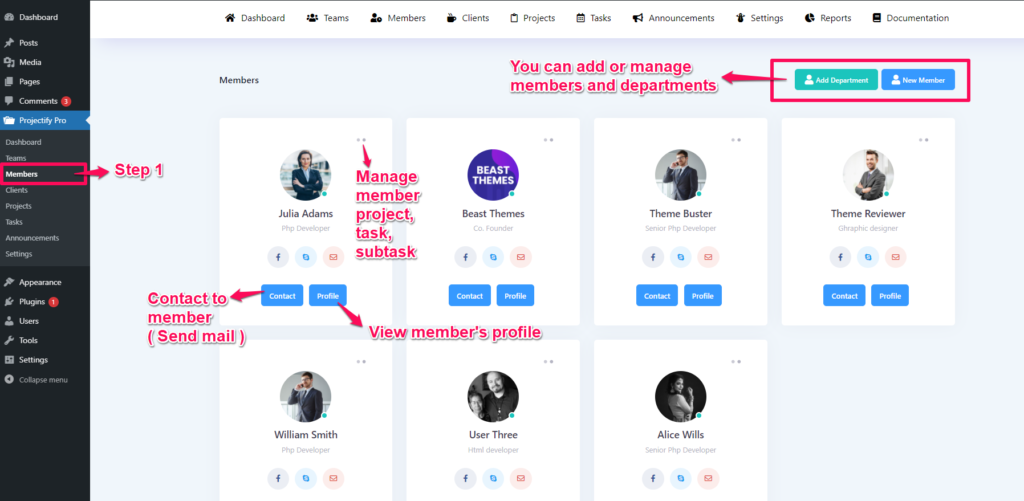
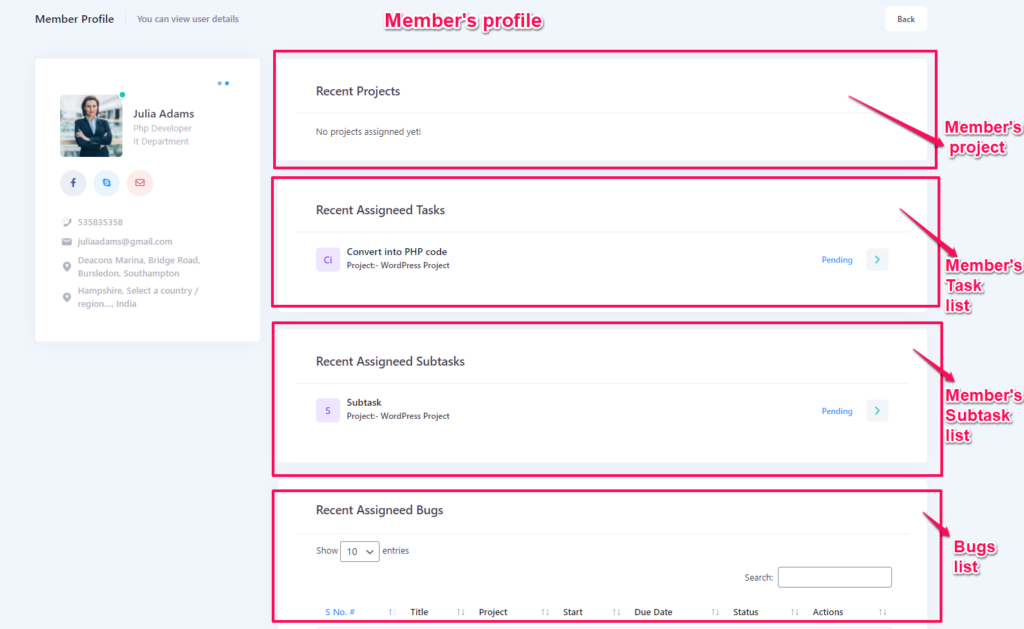
Admin Members Panel
Step 1 – Login to your WordPress Dashboard.
Step 2 – Go to Projectify > Members. To add a new member, click on New Member, but first you need to add some departments for this click on Add Department, then it will open a window fill the details then submit it. to add a new member you have to select if the user exists or not. if the user already exists as a WordPress user then select it through the dropdown and fill in all remaining details about that member and submit the form.
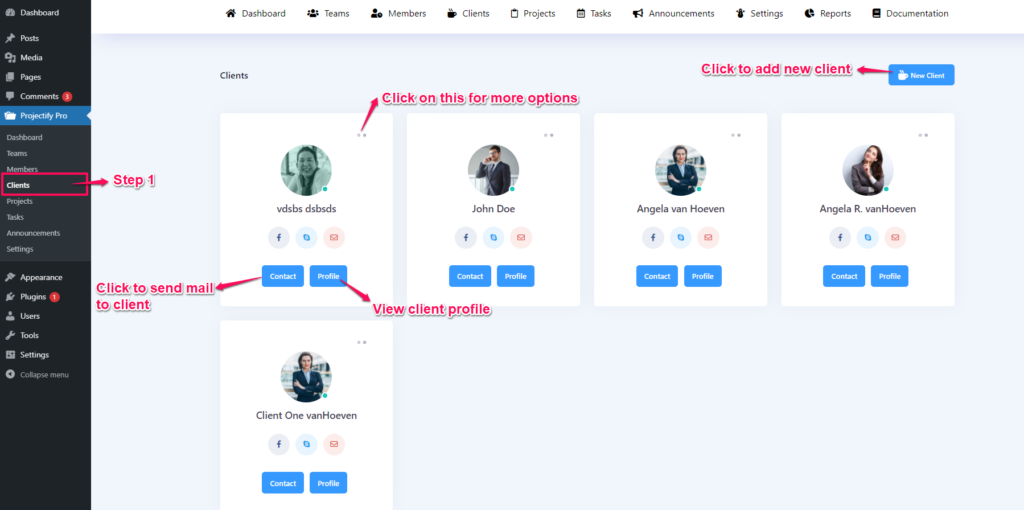
Admin Clients Panel
Step 1 – Login to your WordPress Dashboard.
Step 2 – Go to Projectify > Clients. To add a new client, click on New Client, then it will take you to its form now you have to fill in all details and submit it. it will create a new client. In this form, you have to select an existing user to promote him as a client or you can also create a new user entry as a client from here directly.
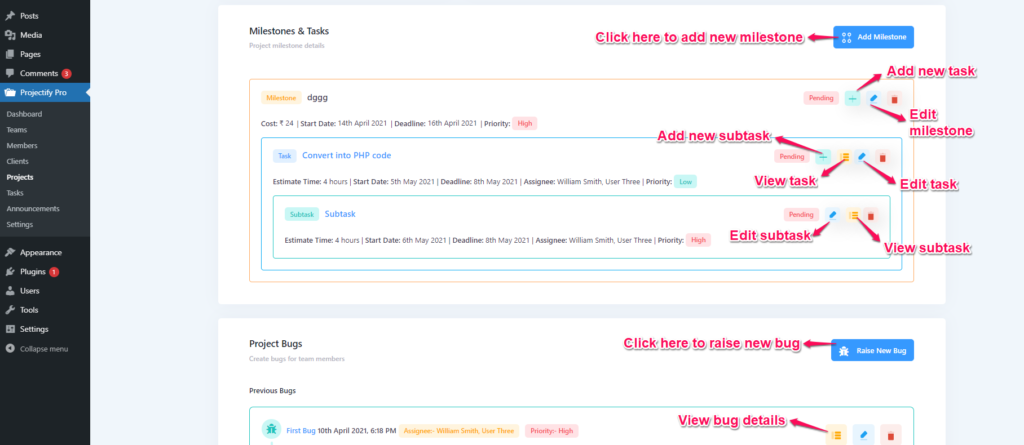
Admin Projects Panel
Step 1 – Login to your WordPress Dashboard.
Step 2 – Go to Projectify > Projects. To add a new project, click on Add project, then the form will appear now you have to fill in all details related to project and select Team & Client and start date, Due date and then submit it.

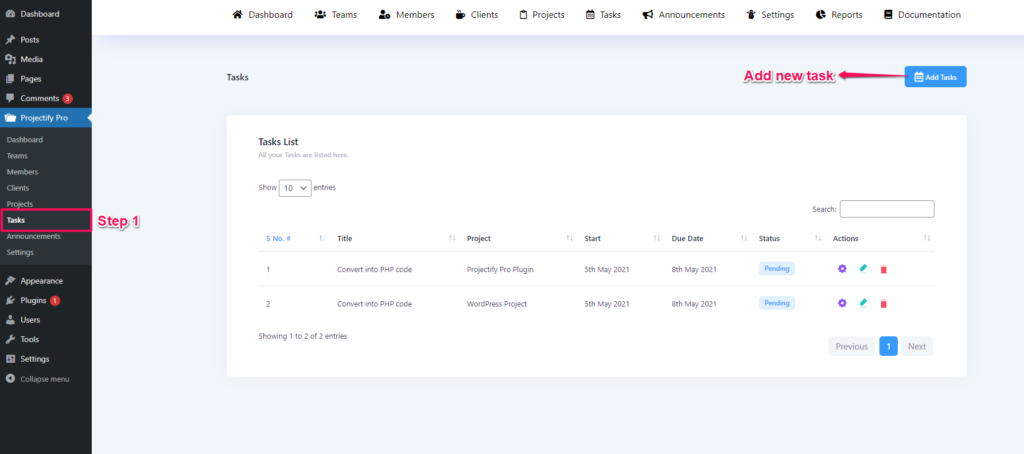
Admin Tasks Panel
Step 1 – Login to your WordPress Dashboard.
Step 2 – Go to Projectify > Tasks. To add a new task, click on Add tasks, then a form will appear now you have to fill in all details related to the task. First select a project, milestone, and select assignees, and submit it.
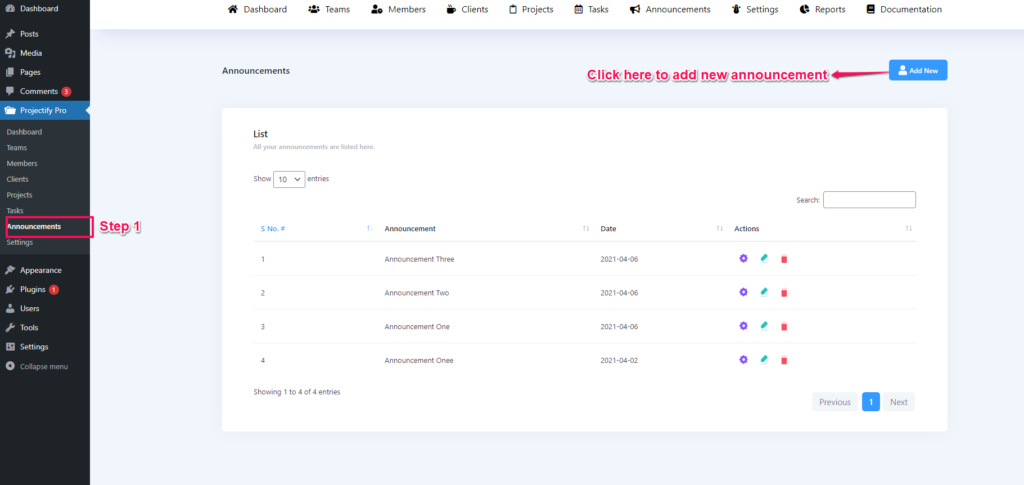
Admin Announcements Panel
Step 1 – Login to your WordPress Dashboard.
Step 2 – Go to Projectify > Announcements. To add a new announcement, click on Add New, then a form will appear now you have to fill in all details about announcement, and submit it.
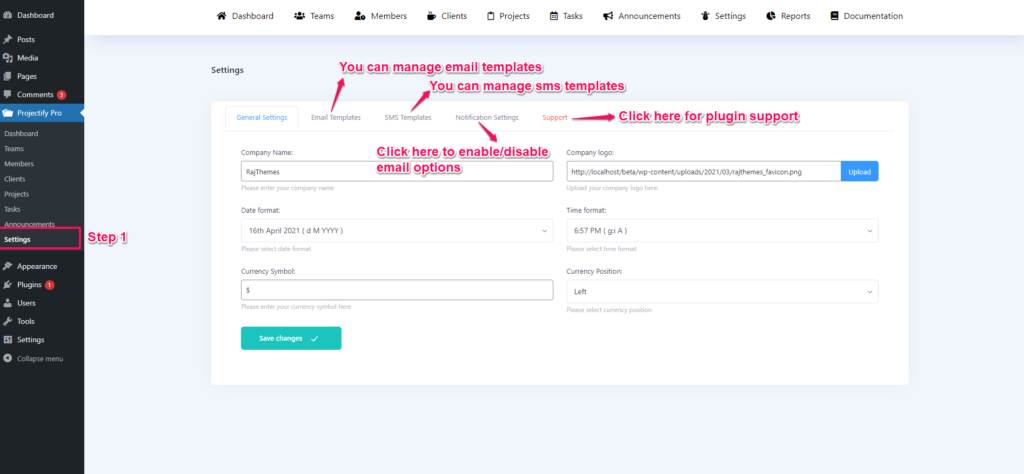
Settings Panel
Step 1 – Login to your WordPress Dashboard.
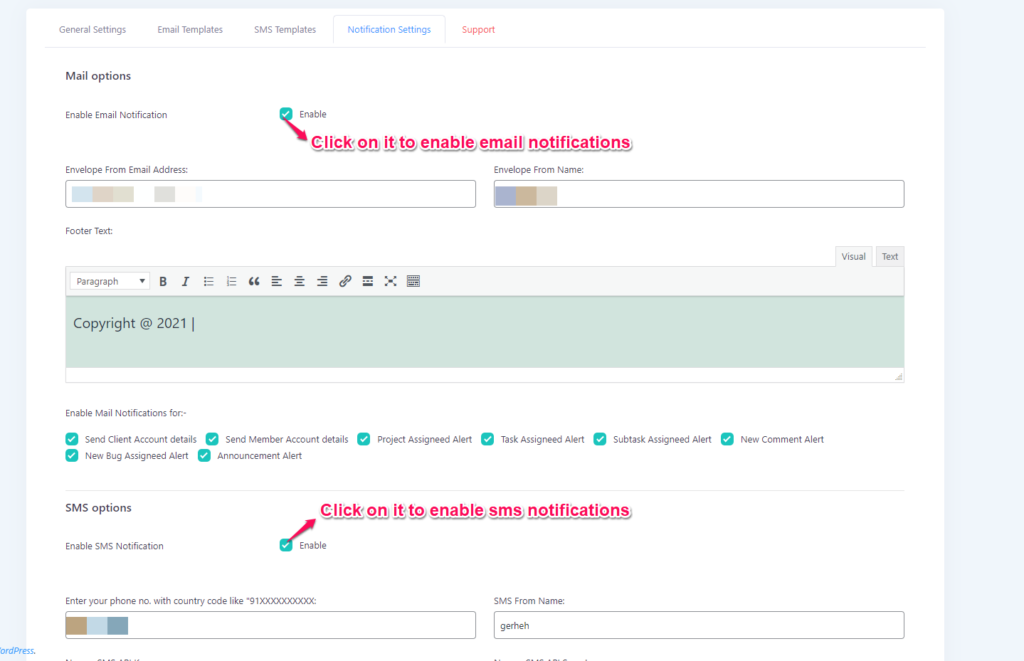
Step 2 – Go to Projectify > Settings. You can manage general settings, Email templates, SMS templates and Notification alerts settings from here.
General Settings:- From here you can manage date, time format, Currency, company name & logo.
Email Templates:- From here you can manage date, time format, Currency, company name & logo.
SMS Templates:- From here you can manage date, time format, Currency, company name & logo.
Notification Settings:- From here you can manage date, time format, Currency, company name & logo.
Support:-
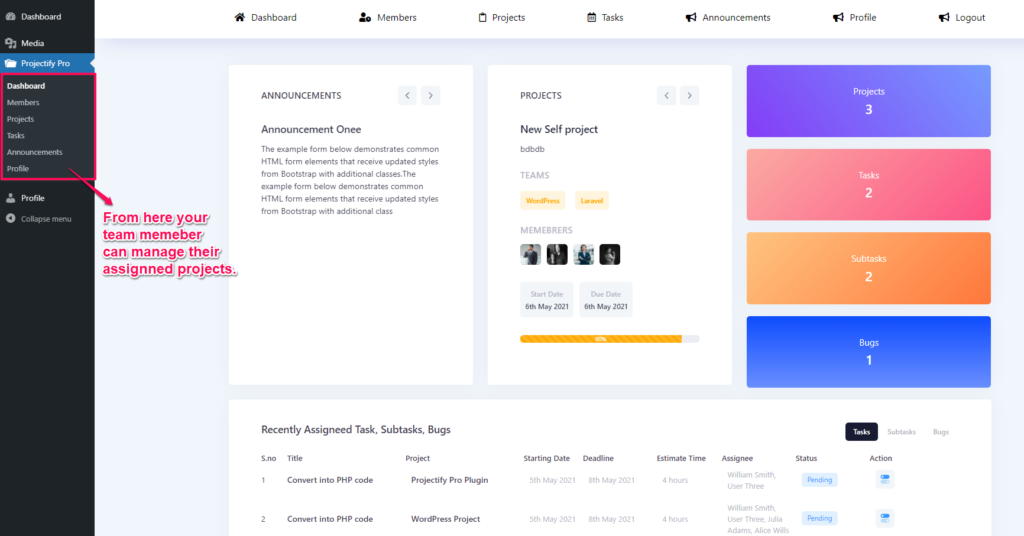
Team Member Dashboard
Your team member can login to their team member dashboard and can access their assigned project and start working on their tasks & subtask. Also you can assignee Bugs to project’s team member to resolve it.
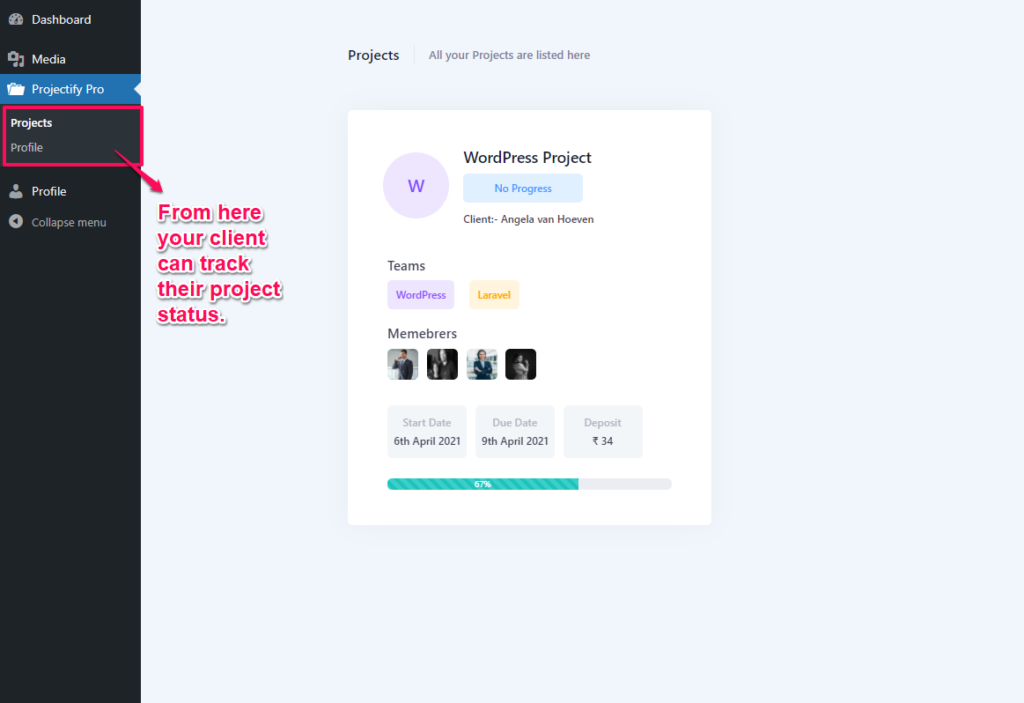
Client Dashboard
Your client can login to their account and access client dashboard and start tracking their project progress & updates.