
Do you want to make a WordPress multisite with different domains?
WordPress multisite allows you to use one WordPress installation to make multiple websites. you’ll even give each site its own name .
In this article, we’ll show you ways to simply create a WordPress multisite with different domains, step by step.
Why Create a WordPress Multisite with Custom Domains?
The easiest way to make an internet site is by using WordPress.
However, for every website that you simply found out, you’ll be got to manage updates, keep backups, and secure all separate WordPress installations separately. Plus some hosting providers limit their basic plans to one WordPress install.
An easier workaround to the present website management issue is to make a WordPress multisite network.
WordPress multisite may be a core WordPress feature that permits you to simply create multiple sites using an equivalent WordPress installation.
The best part is that you simply can use different domains for every of your websites.
This allows business owners to quickly launch websites without fear about managing multiple WordPress installations.
From a development perspective, this also gives you flexibility in sharing customers, similar design elements, and more.
What Do You Need to Create a WordPress Multisite with Custom Domains?
You’ll need the following items to create a WordPress multisite with custom domain names.
- A WordPress hosting company that supports multiple domains and WordPress multisite.
- Domain names that you want to use.
Step 1. Installing WordPress Multisite
If you are creating a WordPress multisite on a brand new website, then you may need to install WordPress first.
Once you have installed WordPress, the next step is to enable WordPress multisite functionality.
Enabling WordPress Multisite Feature
WordPress multisite functionality comes built-in with WordPress, but it’s turned off by default. You’ll get to enable it so as to line up your WordPress multisite.
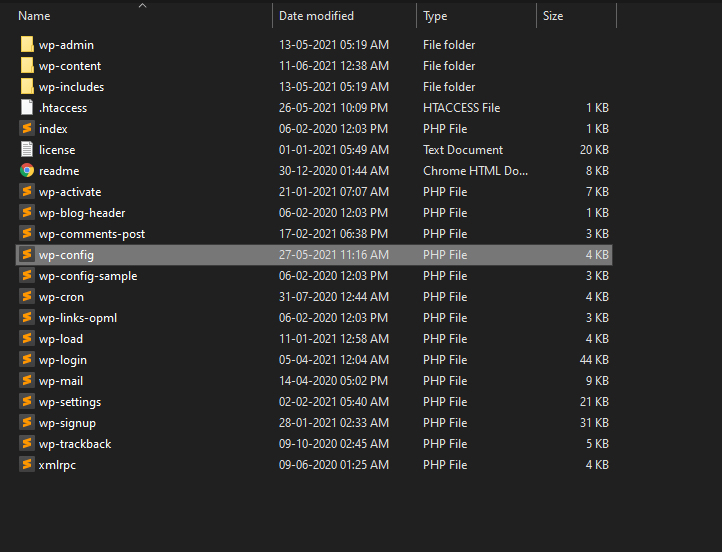
For that, you’ll be got to edit the wp-config.php file. it’s the WordPress configuration file that contains all the important settings for your WordPress installation.
You can edit it by using an FTP client or the File Manager app in your hosting account instrument panel. The wp-config.php file is found under the basis folder of your website.
Inside this file, you will need to add the following line just above the line that says ‘That’s all, stop editing! Happy publishing’.
| 1 | define( 'WP_ALLOW_MULTISITE', true ); |
After that, don’t forget to save your changes and upload the file back to your website.
Now you need to switch back to your WordPress admin dashboard and reload the admin dashboard page. After that, you need to visit the Tools » Network Setup page to configure your WordPress multisite network.
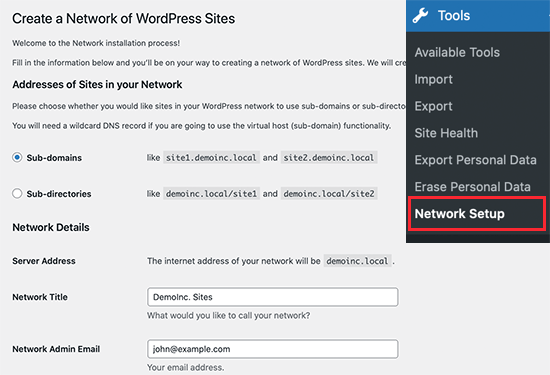
First, you need to choose subdomains as ‘Addresses of Sites in your Network’ provide a title for your multisite network and network admin email address.
Click on the ‘Install’ button to continue.
On the next screen, WordPress will ask you to add two pieces of code.
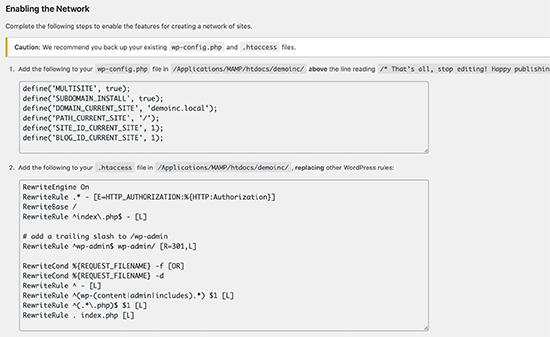
The first one goes into your wp-config.php file just above the line reading ‘That’s all, stop editing! Happy publishing’.
Apart from the code shown by WordPress, you also need to add the following line to your wp-config.php file. This line ensures that users can login to each site.
| 1 | define('COOKIE_DOMAIN', $_SERVER['HTTP_HOST'] ); |
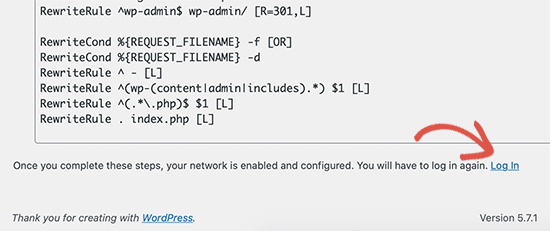
The second piece of goes into your WordPress .htaccess file replacing the default WordPress .htaccess rules.
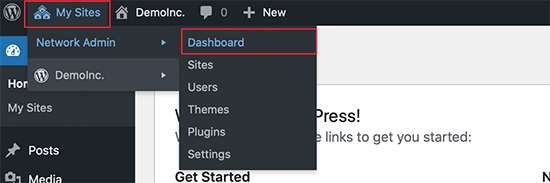
Once you have added both codes to the respective files, you’ll need to login to your WordPress admin dashboard.
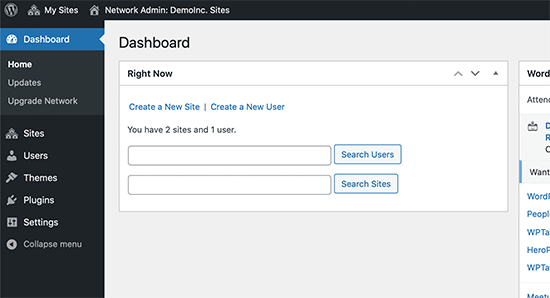
After login, you will see a new menu item in the admin bar titled ‘My Sites’. Take your mouse over it and then select ‘Network Admin » Dashboard’ link.
Step 2. Creating New Sites Using Custom Domains in WordPress Multisite
Now that everything is set up, let’s create your first site using a different domain name.
From your multisite’s network admin dashboard, click on the Sites » Add New page.
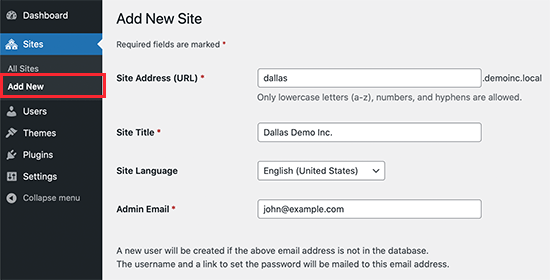
Simply provide a Site Address, Title, select language, and then enter the admin business email address. As for the site address, you can add anything here for now because we will change it to your custom domain in the next step.
Click on the ‘Add Site’ button to create your site.
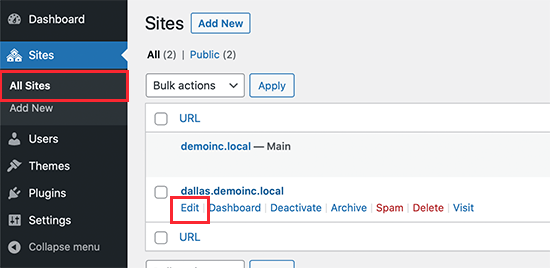
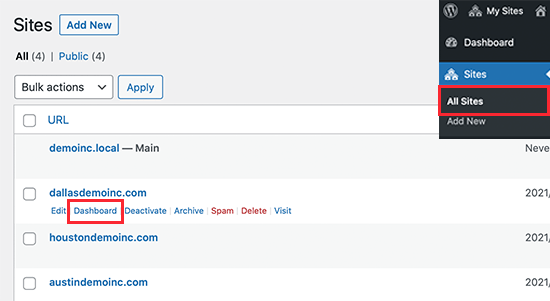
Next, you need to go to Sites » All Sites page and click on the ‘Edit’ link below the site you just created.
On the location edit screen, you would like to feature the custom name that you simply want to use for this website under the location Address field. WordPress comes with built-in domain mapping which can automatically map your custom domains to your Site Address.
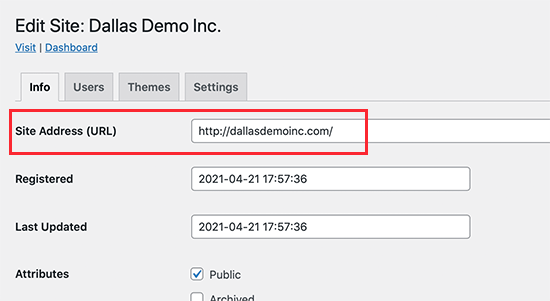
Don’t forget to click on the Save Changes button to store your settings.
Repeat the method to feature more sites then change their site address to the custom domain you would like to use. Here we’ve created a couple of sites with different custom domains.
However, none of these websites will be accessible as your custom domains don’t point to your WordPress hosting company. Let’s change that.
Step 3. Adding Custom Domains to Your Hosting Account
Most WordPress hosting providers allow you to easily add multiple domains to your hosting account.
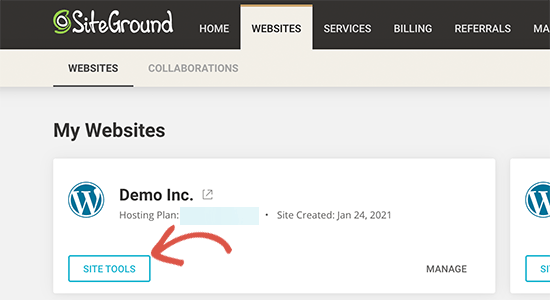
If you are using SiteGround, then click on the Site Tools under your hosting account.
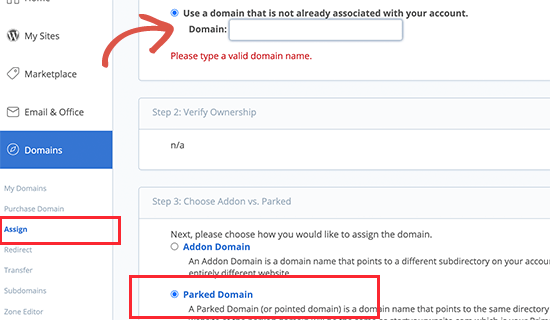
After that, you need visit Domains » Parked Domains and then add your custom domain here.
Repeat the process if you need to add more custom domains.
If you are using another hosting service, then the process is still the same. You’ll find the parked domain option under the Domains section of your hosting dashboard. Here is how it looks on Bluehost.
If you’re using your hosting provider as your domain registrar, then you’ll not got to update the DNS servers.
However, if you’ve got registered your name elsewhere, then you’ll got to update the DNS information and point it to your hosting account.
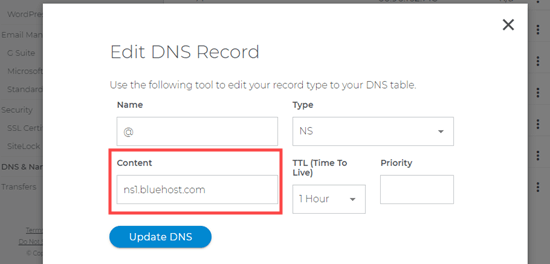
First, you’ll need the DNS information for your hosting provider. you’ll find it under your hosting instrument panel otherwise you can ask their support staff. Usually, it’s like this:
ns1.siteground204.com
ns2.siteground204.com
Once you’ve got the DNS information, you would like to log in to your domain registrar website and click on on the DNS & Nameservers section.
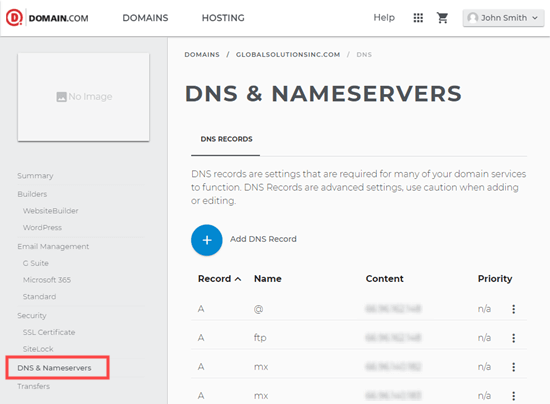
Simply select your domain and edit name server information to replace it with your hosting provider’s DNS.
Note: DNS information may take a while (2-48 hours) to fully update across the internet.
As DNS information is updated, you will be able to see your WordPress multisite’s childsite for each domain.
Step 4. Managing and Login to WordPress Multisite on Custom Domains
You can perform most administrative tasks like installing plugins, themes, and updates from your root site’s dashboard.
To work on individual sites, you need to visit Sites » All Sites page and click on the Dashboard link below the site you want to work on.
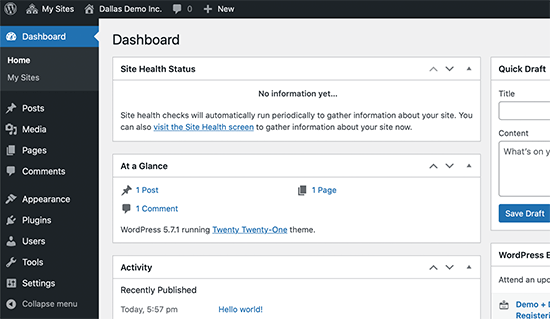
This will take you to that particular site’s admin area, and you may be required to login again. From here, you can create pages, write blog posts, and manage that individual site.
We hope this article helped you learn how to create a WordPress multisite with different domains.