
In this guide, we explore all the features of the “Clockinator Pro WordPress premium plugin” and how to use those features and options that this plugin provides.
Clockinator Pro WordPress premium plugin is the World’s most advanced employee/staff management system Plugin to track their time & Attendance. You can manage Attendance, Departments, Employees, salaries, Real-Time Working Hours, Monthly Report Generation, Leaves, Notices, Holidays, User Roles.
Activating the Clockinator Pro WordPress Premium Plugin ( Staff management system )
After purchasing the plugin you will get a zip file of the plugin that you can directly upload to your WordPress site from “Plugins” > “Add New” > “Upload Plugin”. Then, you can activate the plugin from “Plugins” > “Installed Plugins”.
After activating the plugin, you will see a new menu “Clockinator Pro” on your WordPress admin menu tabs
Clockinator Pro Plugin Features
- Employee management
- Department Management
- Event Management
- Shift Management
- Holiday Management
- Notice Management
- Leave Management
- Location Management
- Attendance & Generate Reports
- Admin Dashboard Panel
- Staff Dashboard Panel
- Email Notification Alerts
- SMS Notification Alerts
- Email Notification Templates
- SMS Notification Templates
- General Settings
- Project Management
- Payslip Generation
- Import/Export Attendance Reports
- Reimbursement Management
Employee management
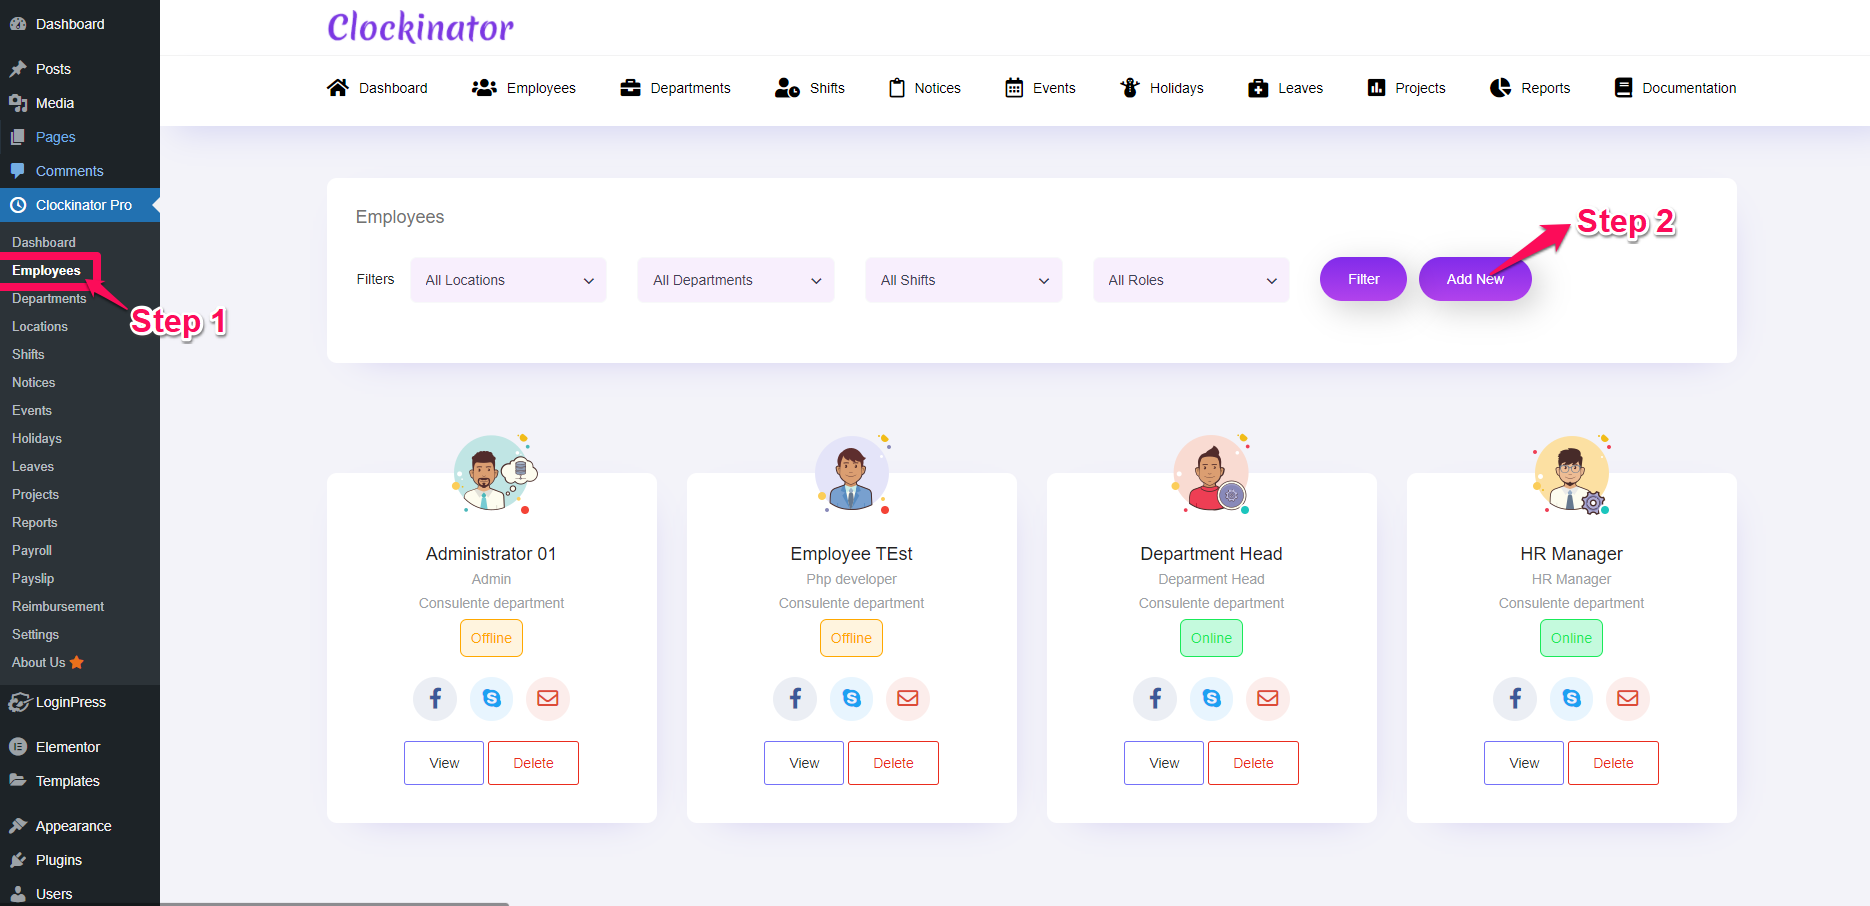
Step 1 – Login to your WordPress Dashboard.
Step 2 – Go to Clockinator Pro > Employees. To add a new employee, click on Add New, then a popup window will open to add a new employee to your system, fill in all details in it, and press the “Save” button. You will find the complete employee list here with their status whether they are active or inactive. You can also create a new WordPress user from here then add it to your employee’s list.

Department Management
Step 1 – Login to your WordPress Dashboard.
Step 2 – Go to Clockinator Pro > Departments. To add a new department, click on Add New, then a popup window will open to add a new department to your system, fill in all details in it, enter its name, select color to indicate that department then select its status and press the “Save” button.

Event Management
Step 1 – Login to your WordPress Dashboard.
Step 2 – Go to Clockinator Pro > Events. To add a new event, click on Add New, then a popup window will open to add a new event to your system, fill in all details in it, enter its title, select events date, enter its description then select its status and press the “Save” button.

Shift Management
Step 1 – Login to your WordPress Dashboard.
Step 2 – Go to Clockinator Pro > Shifts. To add a new shift, click on Add New, then a popup window will open to add a new shift to your system, fill in all details in it, enter its name, select shift timing then select its status and press the “Save” button.

Holiday Management
Step 1 – Login to your WordPress Dashboard.
Step 2 – Go to ClockinatorPro > Holidays. To add a new shift, click on Add New, then a popup window will open to add a new holiday to your system, fill in all details in it, enter its name, select holiday dates then select its status and press the “Save” button.

Notice Management
Step 1 – Login to your WordPress Dashboard.
Step 2 – Go to Clockinator Pro > Notices. To add a new shift, click on Add New, then a popup window will open to add a new notice to your system, fill in all details in it, enter its name, enter its description then select its status and press the “Save” button.

Leave Management
Step 1 – Login to your WordPress Dashboard.
Step 2 – Go to Clockinator Pro > Leaves. From here you can check which employee request you for any leave and you can “Approve” or “Reject” it from here. If you change its status then that employee will get a notification for that leave.

Location Management
Step 1 – Login to your WordPress Dashboard.
Step 2 – Go to Clockinator Pro > Locations. You can add locations( TimeZones ) for your employees. you can assign different time zones to your employees so they can be comfortable in their own timezone timing or hours( According to their local time ). This option is very useful if you have employees from different countries.
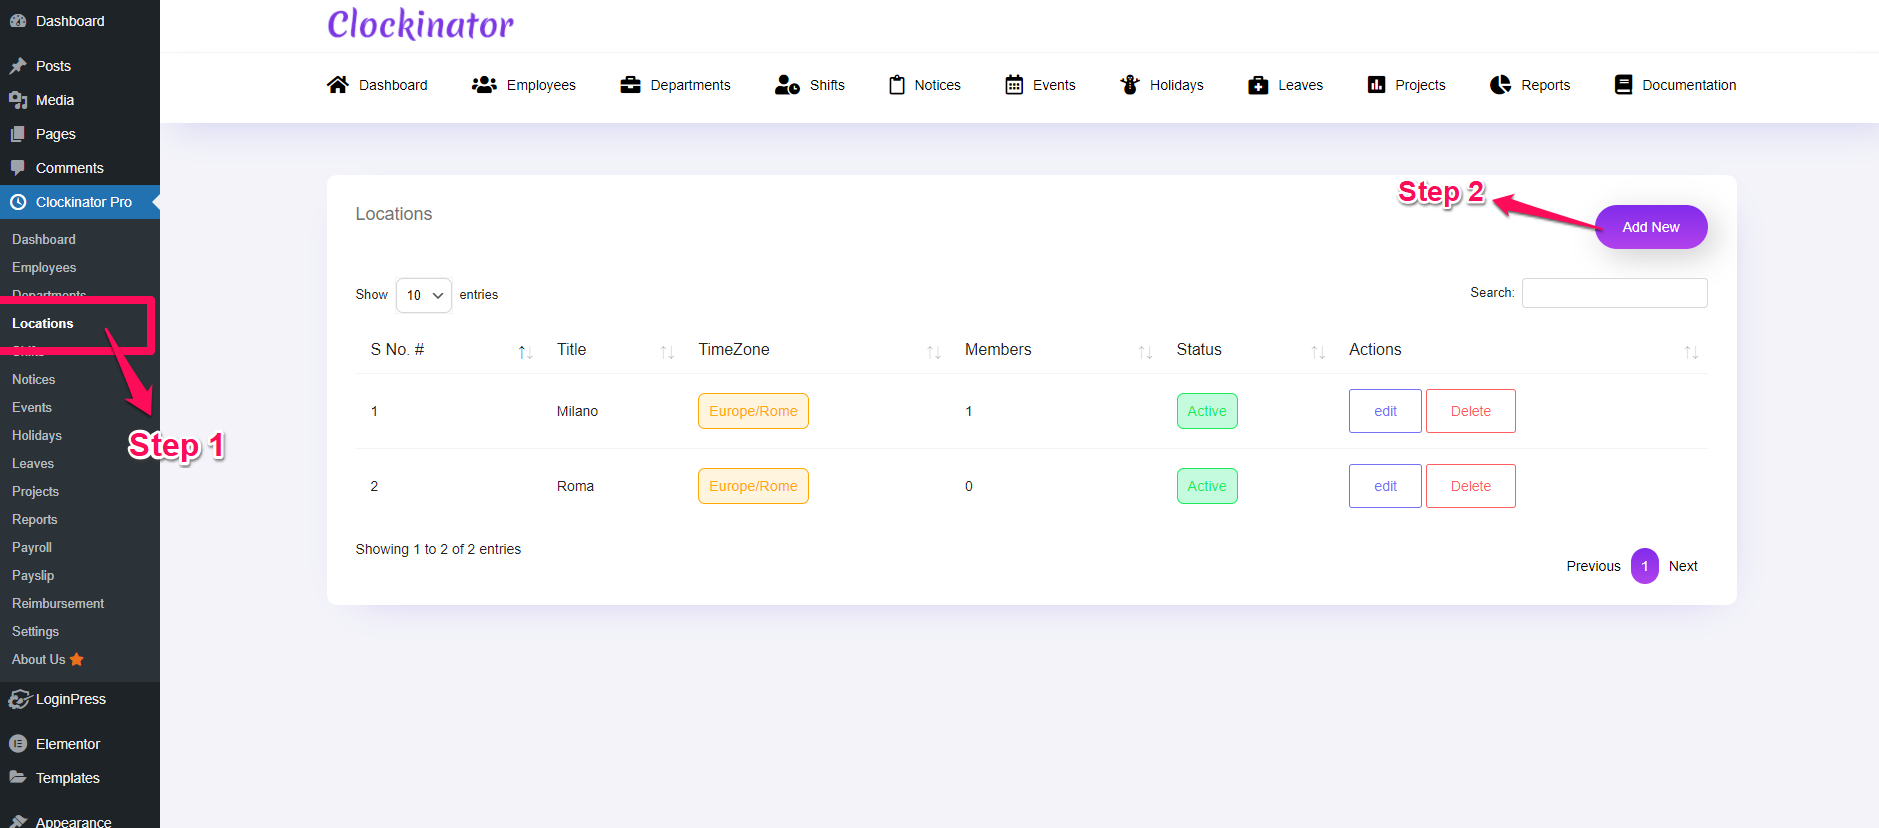
You can add a new location by click on the “Add new” button then enter its title, select time zone and enter some description for it. now submit the form and it’s done!.
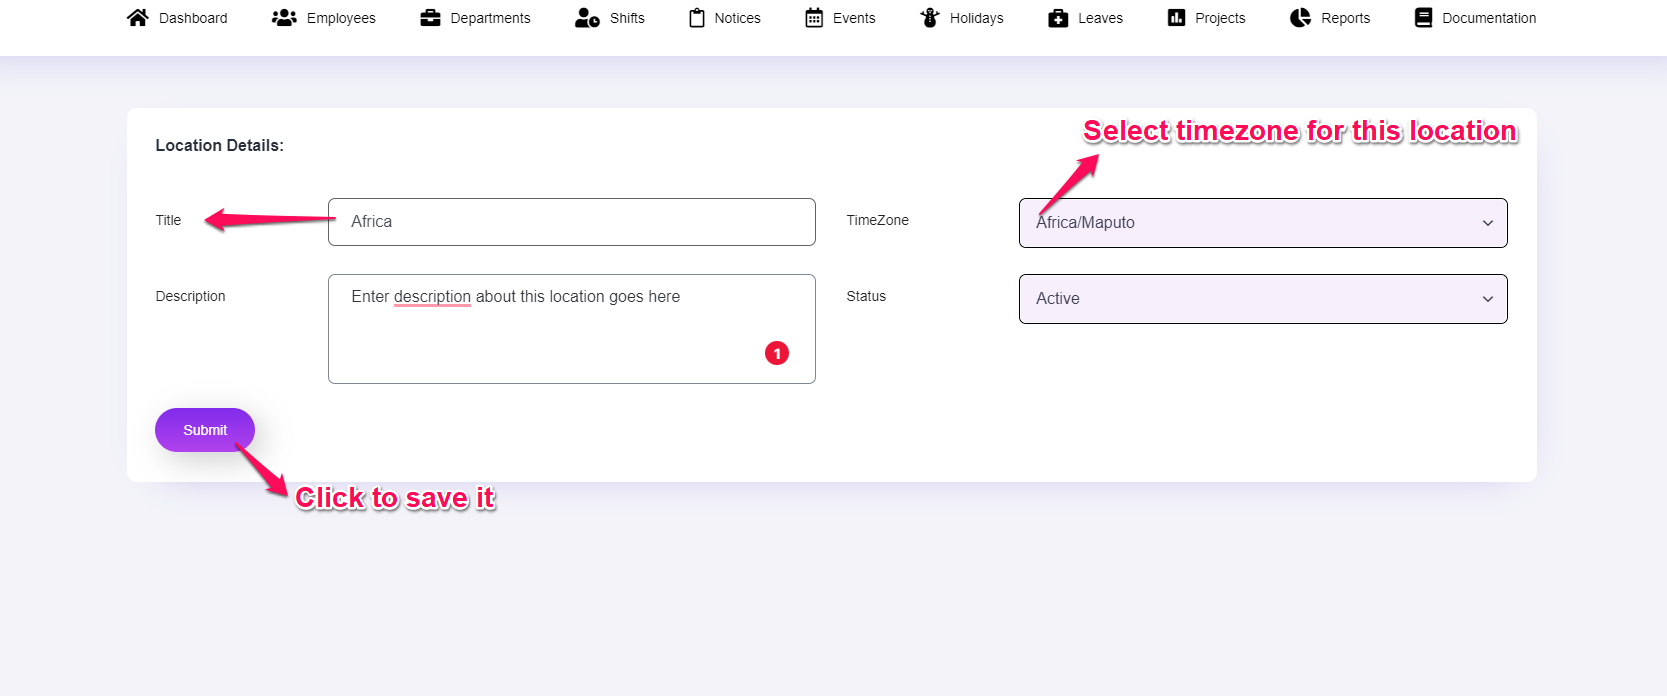
Now while creating an Employee you can assign that location to any employee by selecting that location in the “Employee Creation form”.
Attendance & Generate Reports
Step 1 – Login to your WordPress Dashboard.
Step 2 – Go to Clockinator Pro > Reports. To generate an attendance report for any employee first you need to select that employee through the dropdown option, then select month then submit the form. It will generate reports for that employee of that month. Also, generate its calculated salary below the reports table for that month.


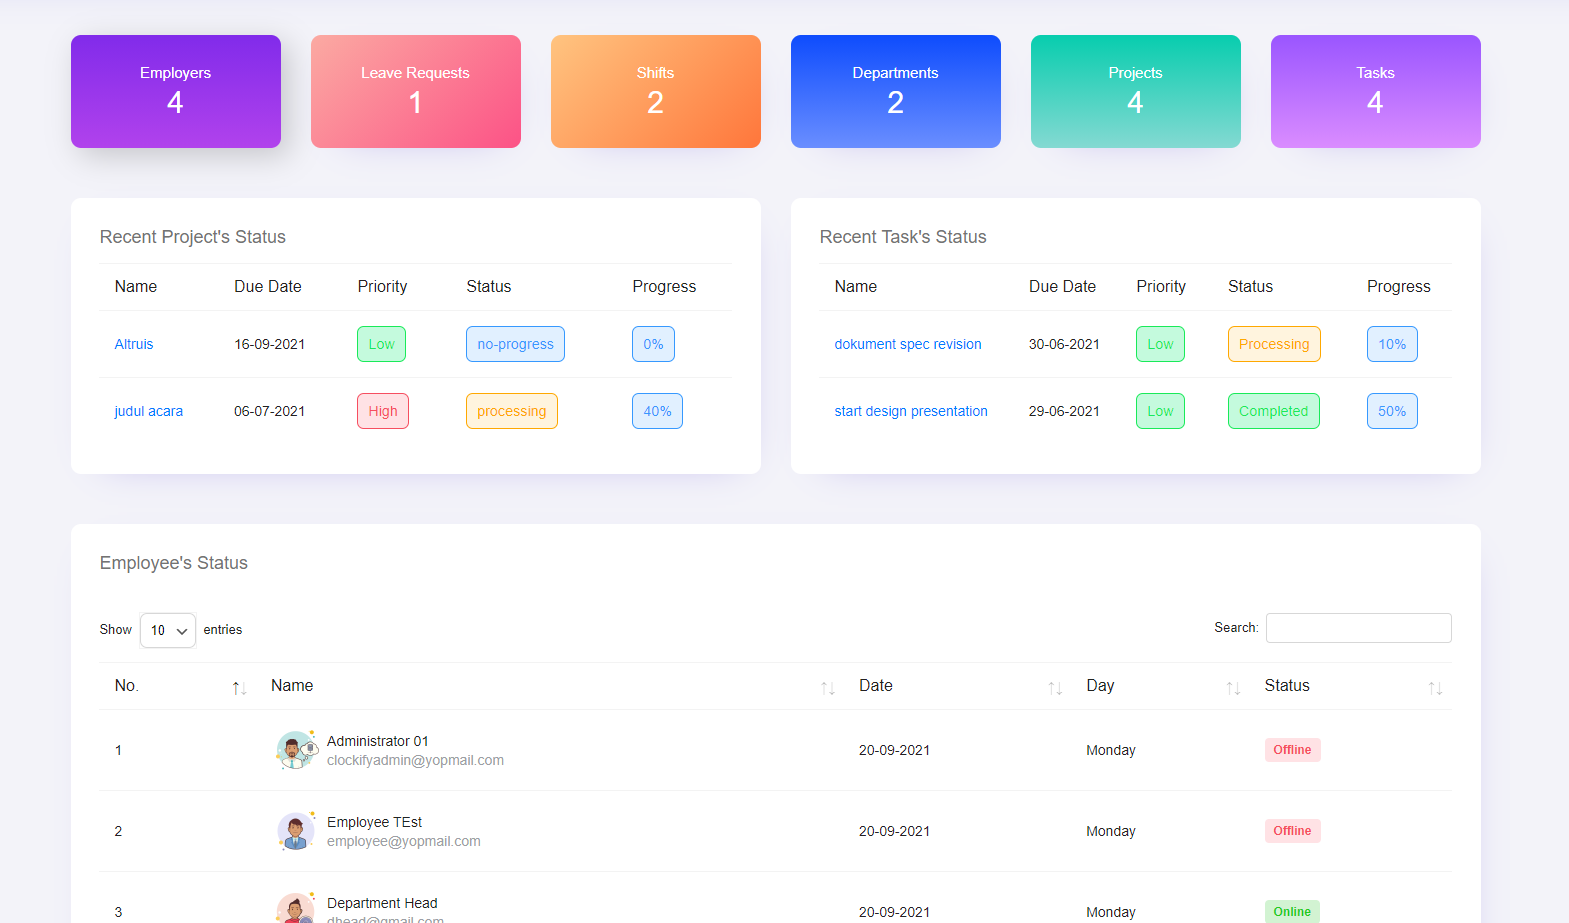
Admin Dashboard Panel
Staff Dashboard Panel
In our plugin, we provide both “Frontend” and “Backend” dashboards for employees and others also.
You can choose or manage which interface your employee can have from the “Settings” tab and the Frontend dashboard can be created by our Shortcode also “[btcl-dashboard]” just use this shortcode on any page or post an update.

Email Notification Alerts
Step 1 – Login to your WordPress Dashboard.
Step 2 – Go to Clockinator Pro > Settings > Notification Settings > Mail Options.

SMS Notification Alerts
Step 1 – Login to your WordPress Dashboard.
Step 2 – Go to Clockinator Pro > Settings > Notification Settings > SMS Options.

Email Notification Templates
Step 1 – Login to your WordPress Dashboard.
Step 2 – Go to Clockinator Pro > Settings > Email Templates.

SMS Notification Templates
Step 1 – Login to your WordPress Dashboard.
Step 2 – Go to Clockinator Pro > Settings > SMS Templates.

General Settings
Step 1 – Login to your WordPress Dashboard.
Step 2 – Go to Clockinator Pro > Settings > General Settings.

Project Management
Step 1 – Login to your WordPress Dashboard.
Step 2 – Go to Clockinator Pro > Settings > Projects. From here you can create a project or assign that project to your employees and also create individual tasks for each employee in it and assign them individually.
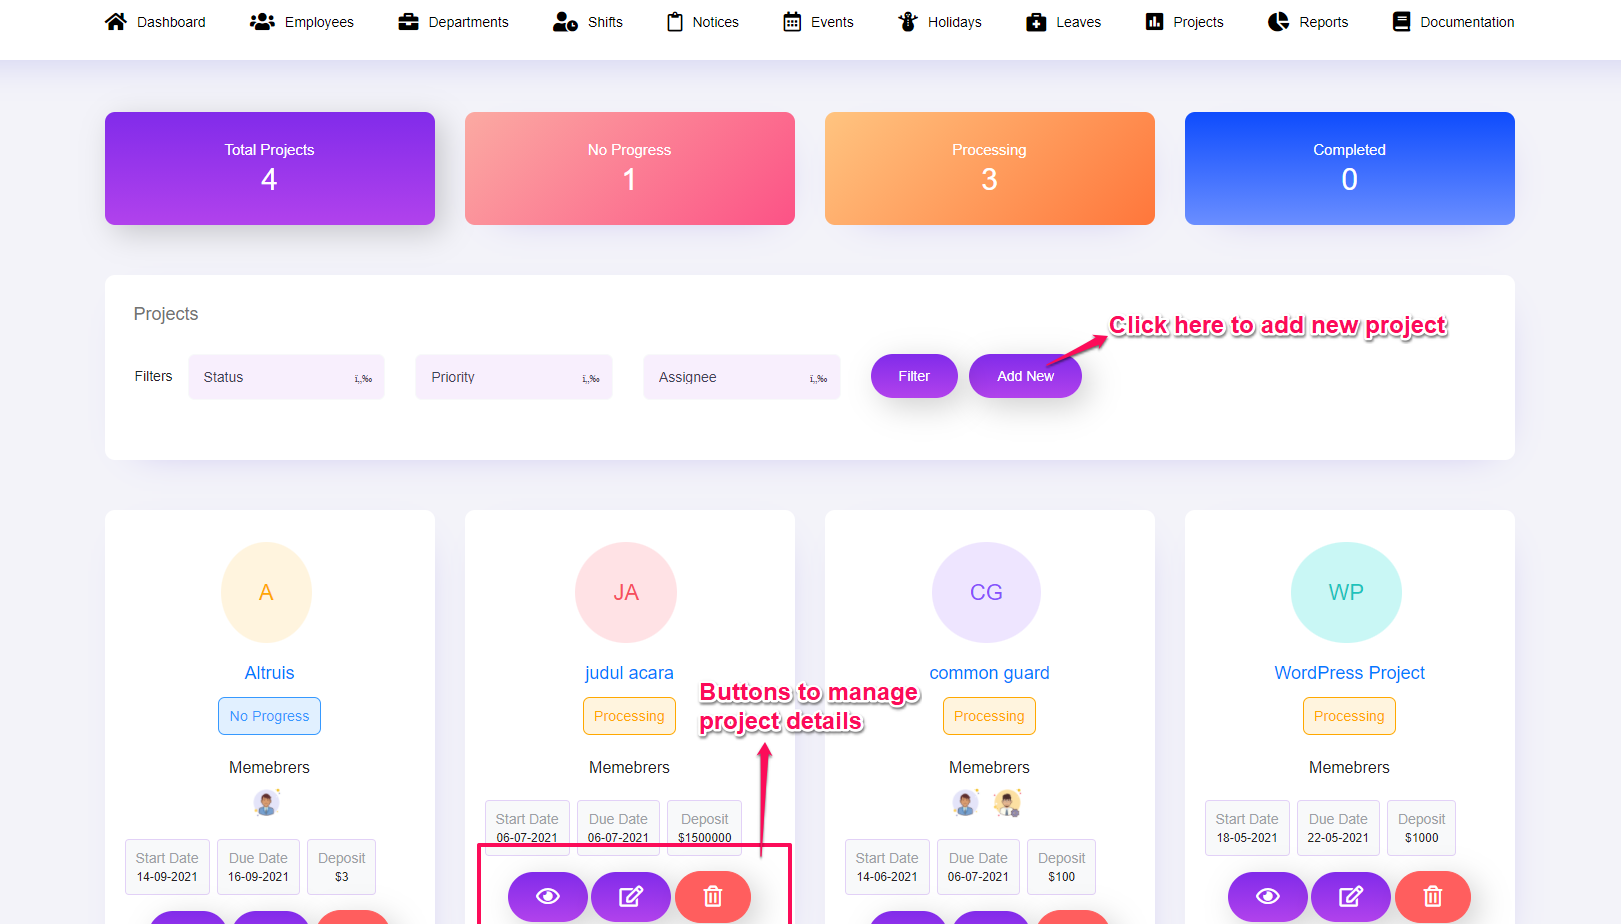
You can track your project status or task status from here and keep records of all your project tasks.

Payslip Generation
Step 1 – Login to your WordPress Dashboard.
Step 2 – Go to Clockinator Pro > Settings > Payslip. First select month, then department then click on generate. it will generate that month’s payslip for your employees, you can view the payslip by click on the “View” button, also you can send, print, download it.
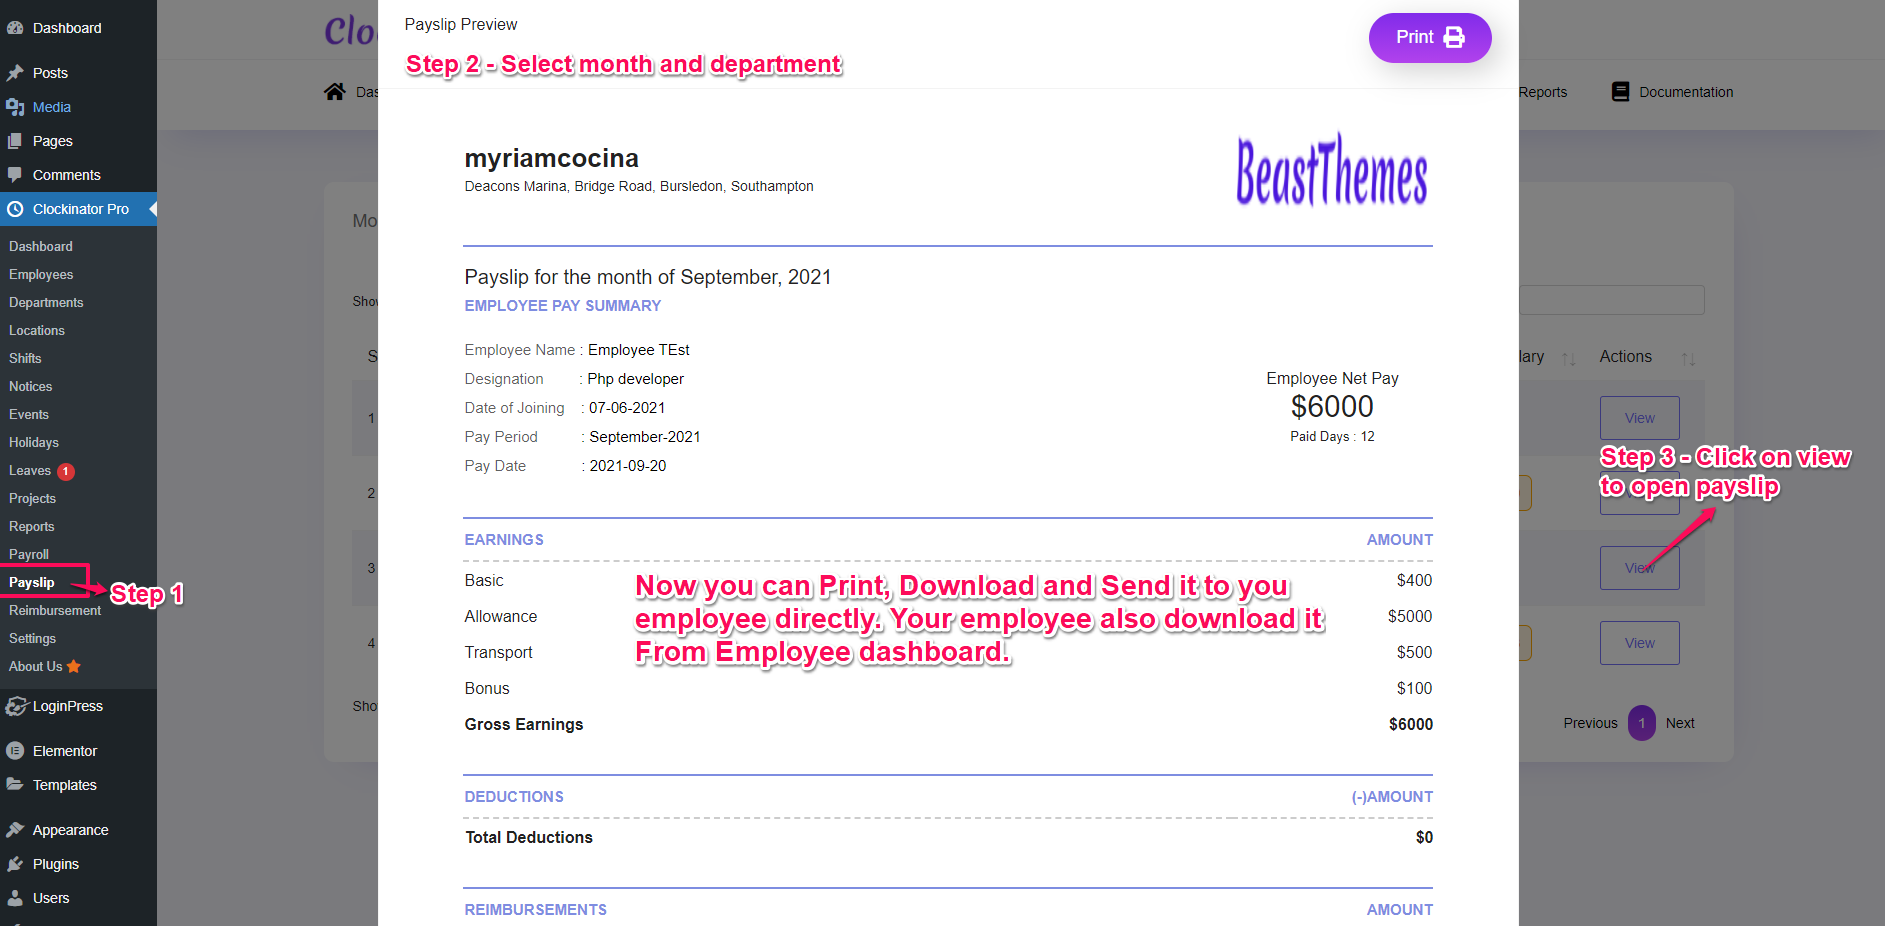
Your employee can also view, print, and download its monthly payslip from their Employee Dashboard( from Both frontend and backend employee dashboard ).